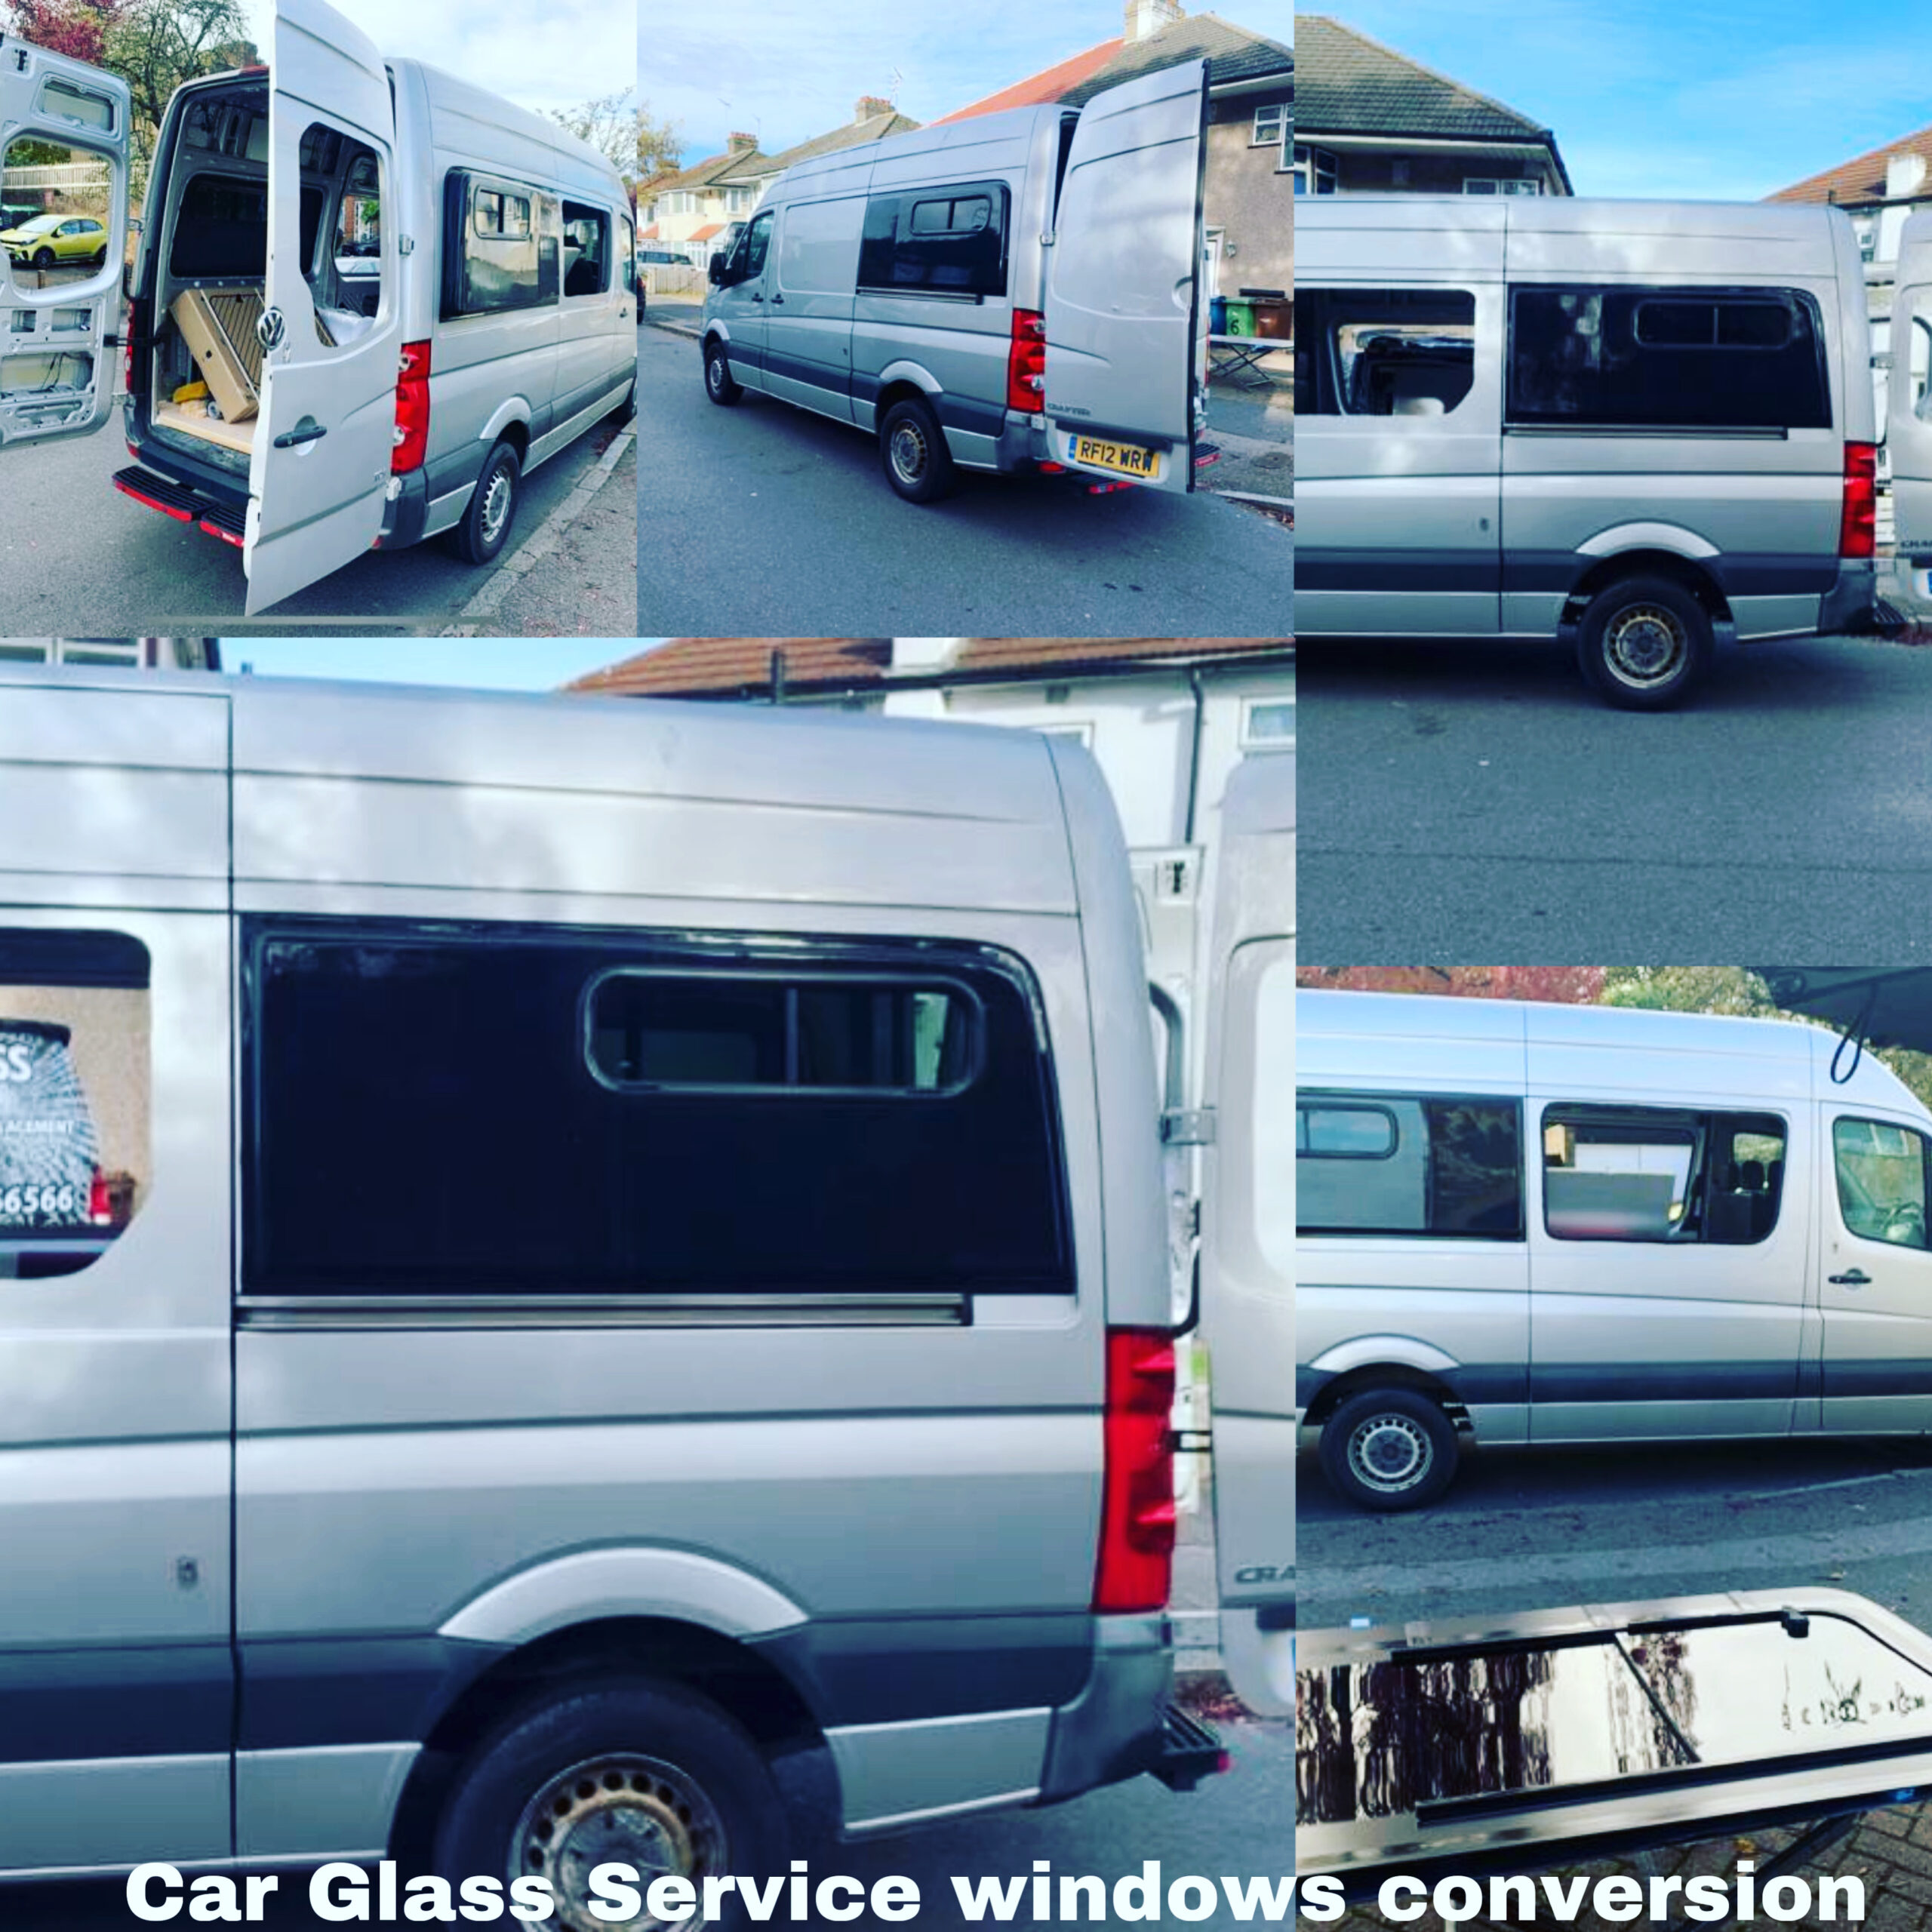
Van Conversion Window Installation Example
A van conversion window installation example is useful because it shows where the real care is needed. The glass itself may look straightforward, but the cut line, bare-metal protection and bonding process decide whether your new campervan window stays dry, secure and tidy for years.
For a typical panel van conversion, the job is not simply a case of cutting a hole and applying sealant. A professionally fitted side window has to sit correctly in the body panel, follow the van’s shape, avoid structural sections and bond evenly all the way around. Get one stage wrong and you may be dealing with water ingress, wind noise, damaged paintwork or a window that does not sit flush.
A practical van conversion window installation example
Picture a medium-wheelbase panel van being converted into a two-berth campervan. The owner wants a fixed, privacy-tinted bonded window fitted into the near-side sliding door and a matching fixed window in the panel behind the driver. The aim is more daylight, better views when parked and a finished look that matches factory glazing.
Before any cutting starts, the correct glass is selected for that exact van model, door type and panel position. This matters because window shapes vary between manufacturers and even between model years. OEM-standard or equivalent automotive glass, correctly marked for vehicle use, gives the best fit and durability.
The technician checks both sides of the van from inside and outside. On the sliding door, the window must clear the inner frame, locking mechanism, cables and door runners. On a rear side panel, it must avoid strengthening ribs and allow enough flat bonding surface around the aperture. A window can look centred from the outside but still interfere with the structure behind the panel, so measuring from one side alone is not enough.
Marking the aperture accurately
With the glass template positioned, the cut area is marked carefully on the van body. Reference points such as panel seams, door edges and factory pressings help keep the window level and balanced with the opposite side.
Masking the surrounding paintwork protects it from scratches and gives a clear working edge. The interior is also prepared before cutting. Trim, insulation, wiring and furniture near the panel should be moved or covered, while the floor is protected from swarf and metal filings.
This is a stage where rushing causes expensive problems. An opening that is too large cannot be made smaller. An aperture that is slightly out of line may leave uneven black borders around the glass and spoil the appearance of the conversion.
Cutting the van panel
A small pilot hole is drilled in a safe part of the marked area, then the aperture is cut with the correct tools. The panel must be supported as the final section is released, especially on a large side window. Letting the off-cut drop can bend the panel or scratch the van.
The fresh edge is then smoothed and checked against the glass. Sharp or uneven metal can prevent a close fit and may damage the bonding system over time. At this point, the technician also removes every trace of swarf from the inside of the van. Metal dust left behind can stain paint, work into insulation or later cause rattles.
Cutting is often the noisiest part of the job, but it is not the whole job. A clean, corrosion-protected edge is what gives the installation a proper foundation.
Protecting the cut edge before window bonding
Once the opening is correct, the exposed metal is cleaned, treated and primed as required by the adhesive system. This is essential on a converted van because the cut edge has removed the factory paint protection.
Skipping this step may not show immediately. Months later, moisture can find its way beneath the bond line, leading to rust around the window aperture. In a campervan, that can also affect insulation, lining boards and the inside finish.
The primer and adhesive must be compatible with the glass and vehicle body. Household silicone is not a substitute for automotive bonding products. It can make future replacement difficult, may not provide reliable structural adhesion and is prone to leaving a messy finish. Professional-grade polyurethane adhesive is designed to cope with movement, vibration, temperature changes and wet weather.
Preparing the glass and adhesive bead
The back of the window is cleaned and prepared according to the manufacturer’s process. Any primers are applied only where needed and allowed the right time to flash off. The adhesive is then laid as one continuous, even bead around the aperture.
The bead height and shape matter. Too little adhesive can leave voids or prevent the glass from sitting at the right level. Too much can squeeze into view from inside or make the glass stand proud of the bodywork. Breaks in the bead can create a direct path for water.
On a sliding-door window, attention is also paid to how the door flexes and closes. The fitted glass must not foul the seal, runner or adjacent body panel. A few millimetres of poor positioning can soon become noticeable when the door is used every day.
Fitting and checking the van conversion window
The window is lifted into place using safe glass-handling methods and aligned with the marked reference points. It is pressed firmly into the adhesive bed, then checked from different angles to make sure the border is even and the glass follows the body line. Retaining tape may be applied while the adhesive cures.
A neat bonded window should look factory fitted rather than added as an afterthought. The black ceramic edge around the glass conceals the bond line and protects the adhesive from sunlight, while privacy tint gives passengers more comfort and keeps the conversion looking smart.
After fitting, the technician checks the door operation, nearby trims and any cables or mechanisms that were moved during preparation. The glass is cleaned, the work area is cleared and the customer is advised on the curing period. Avoid washing the van straight away or putting unnecessary pressure on the new window until the adhesive has reached its stated safe strength.
A controlled water test can be carried out once appropriate for the product used. The test should be gentle and methodical, checking the perimeter from outside while the interior is inspected for any sign of moisture. Flooding a newly fitted window with a high-pressure jet wash is not the right test.
Choosing fixed, opening or sliding windows
The best window layout depends on how the van will be used. Fixed bonded glass is usually the cleanest option for light and visibility, with fewer moving parts. It works well on sliding doors and rear panels where ventilation is already handled by roof vents, a skylight or front cab windows.
Opening windows are useful for overnight ventilation, particularly in a sleeping area. They cost more and need careful positioning so that they do not clash with cupboards, beds or an awning. Sliding windows can be practical, but the tracks and seals need regular cleaning to keep them working properly.
Privacy glass is popular for campervans, although it should not be relied on as security. Valuables should remain out of sight, and any window layout should still give the driver suitable visibility. If you are adding rear or side glazing as part of a larger conversion, plan it alongside insulation, electrical cable runs, furniture and roof accessories rather than treating it as the final job.
When professional fitting makes the difference
A confident DIY builder may be capable of cutting a panel, but bonded automotive glazing has little room for correction. The cost of replacing wrongly cut bodywork, repairing corrosion or removing a badly bonded window is usually far greater than having it fitted properly first time.
Professional fitting is especially worthwhile for curved body panels, sliding doors, flush-fit factory-style glass and vans that will be used for work as well as weekends away. It also saves the practical headache of moving large, fragile glass and finding a dry, suitable place to complete the installation.
Car Glass Service provides van conversion glass fitting across West London, with suitable windows supplied and fitted for many popular panel vans. Whether you are building a simple day van or a full campervan, an accurate survey and a clear quote before cutting give you a far better result. The right window should add light to the conversion without adding future leaks, rattles or worries.