How to Replace a Heated Rear Window Safely
A rear screen can look like a simple piece of glass until it shatters on the drive, leaks around the edge, or stops clearing mist on a cold morning. Knowing how to replace heated rear window glass matters because this job involves more than removing broken glass. The rear screen is commonly bonded into the bodywork, connected to electrical terminals and, on many vehicles, tied into aerials, cameras or trim systems.
For most drivers, the safest answer is to arrange professional replacement rather than attempt a full DIY fit. A correctly fitted heated rear window restores clear vision, keeps the vehicle weatherproof and avoids damage to paintwork, interior trim and electrical connections. Here is what the work involves, what you can check yourself, and when it is time to call a fitter.
When does a heated rear window need replacing?
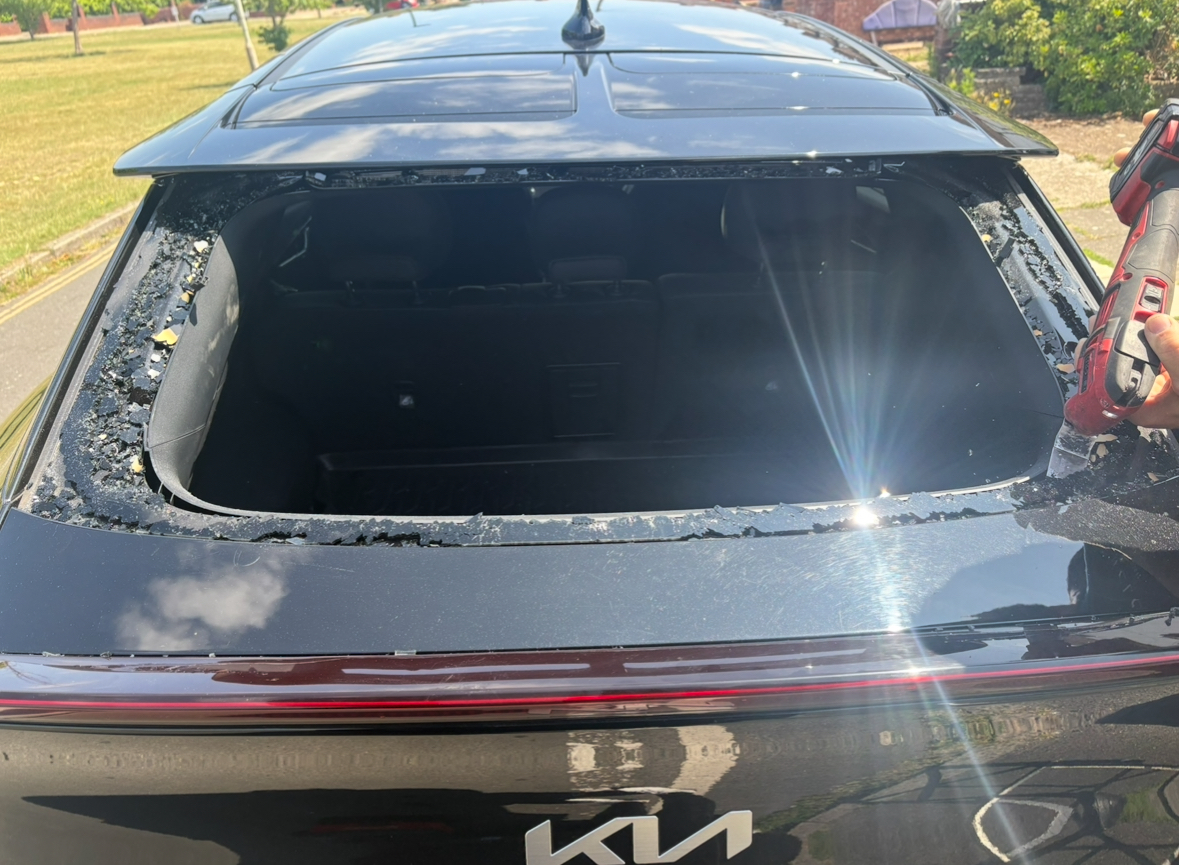
Replacement is usually needed after impact damage, vandalism or an accident has cracked or shattered the glass. Unlike a front windscreen, a rear window is made from toughened safety glass. Once it fails, it often breaks into hundreds of small cubes, leaving an open rear aperture rather than a contained crack.
A screen may also need changing where it has been badly scratched, is leaking around the bonded edge, or has damaged heating elements that prevent the demister from doing its job. A few failed lines do not always mean a new screen is required, but widespread damage to the printed heating grid can make replacement the sensible option.
Do not ignore a loose rear screen or water entering around its edge. Moisture can soak the boot carpet, affect electrical equipment and lead to mould or corrosion over time. If the glass has broken, clear visibility and vehicle security are immediate concerns too.
Check what is fitted before ordering replacement glass
Rear windows are not interchangeable just because they look similar. The correct glass must match the vehicle’s make, model, year, body style and trim level. A hatchback, estate, coupe and van from the same model range can all use different rear glass.
Before any replacement is booked, check for features such as a heated screen, built-in aerial, privacy tint, opening tailgate glass, camera mount, wiper hole, high-level brake light arrangement or sensor connections. A registration number often helps identify the right part, but the fitter may also request photographs and the VIN to confirm the specification.
This step is particularly important for vans and converted vehicles. Rear glazing can differ from factory-fit glass, and additional wiring for cameras, internal lighting or campervan equipment may be present. The right screen and the right preparation prevent delays on the day.
How to replace a heated rear window properly
A professional replacement follows a controlled process. It is not simply a case of lifting out the old pane and applying sealant around a new one.
1. Make the vehicle safe and protect the interior
The technician first checks the extent of the damage and protects the paintwork, tailgate, boot area and rear seats. Loose toughened glass gets everywhere, including inside trim panels and drainage channels, so careful clean-up is part of the job.
The rear demister wiring is disconnected before the glass is removed. On many vehicles, the terminals are bonded directly to the screen and need gentle handling. Pulling them off carelessly can damage the wiring or connector.
2. Remove trims and cut out the bonded glass
Exterior mouldings, interior trims, wiper parts and other components may need to come off to gain proper access. The old bonding adhesive is then cut through with specialist tools.
This is one of the main reasons DIY replacement carries risk. A blade or wire can easily mark painted edges, damage a tailgate, catch an interior panel or cause injury. The remaining adhesive also has to be trimmed to the correct level, leaving a sound surface for the new bonding system.
3. Prepare the aperture and treat any damage
With the broken screen removed, the frame is cleaned of glass fragments, dust and old sealant. The fitter checks for scratches, corrosion or paint damage around the aperture. Bare metal needs the appropriate treatment before glass is bonded back in place, otherwise corrosion can develop beneath the adhesive.
The bonding area must be clean, dry and prepared with the primer and adhesive specified for automotive glazing. Household silicone is not a substitute. It does not provide the same structural bond, cure time or long-term resistance to vibration and weather.
4. Bond in the correct replacement screen
A high-quality automotive polyurethane adhesive is applied in a continuous, even bead. The new heated rear window is positioned accurately with the correct spacing and pressed into place. Alignment matters: an uneven fit can leave poor gaps, disturb the trim or cause a leak.
OEM-standard glass and materials are worth asking for. They are designed to fit correctly and withstand the temperature changes, vibration and daily use a rear screen faces. Very poor-quality glass can create problems with fit, tint match or electrical connections.
5. Reconnect the heater and refit components
Once the screen is secure, the demister terminals are reconnected, followed by the wiper, trims, mouldings and any camera or aerial equipment. The work area is vacuumed thoroughly, including the boot and rear seating area where possible.
The adhesive then needs its specified curing time. This varies with the bonding product, temperature and humidity. Avoid slamming the tailgate or driving away before the fitter confirms the vehicle is safe to use. Closing a door sharply can create pressure in the cabin and disturb fresh adhesive.
Testing the rear demister after fitting
The heating system should be checked once the new glass has been fitted and the vehicle is ready. With the engine running where required, switch on the rear demister and look for the indicator light. The screen should begin to clear evenly after a few minutes in cool or damp conditions.
A fitter can also test the electrical feed and earth connection if the screen does not heat. Sometimes the fault is not in the glass itself. It may be a blown fuse, relay, switch, wiring break or poor connection at the tailgate hinge area.
Do not scrape the inside of the screen with metal tools or attach adhesive accessories across the heating lines. The fine printed elements are easily damaged. If one line stops working later, a specialist conductive repair may be possible, depending on the extent and position of the damage.
Can you replace a heated rear window yourself?
It is possible for an experienced person with the correct tools, glass handling equipment, adhesive system and technical information. But it is rarely a sensible first-time job on a vehicle you rely on every day.
The trade-off is clear. Doing it yourself may appear to save labour costs, but a wrong screen, broken trim, paint damage, water leak or failed bond can cost more to put right. There is also the risk of cutting yourself on broken glass and the difficulty of safely removing every fragment from the vehicle.
A professional is especially advisable if the rear screen is bonded, the vehicle has a reversing camera or aerial built into the glass, the tailgate has suffered accident damage, or you need the work completed at home, work or roadside. For drivers and van operators across West London, a mobile glazing service can replace the screen where the vehicle is parked, subject to safe working space and weather conditions.
What to do while waiting for replacement
If the rear window has shattered, remove loose glass only if you can do so safely. Wear gloves and avoid putting your hands inside sharp edges. Keep children and pets away from the vehicle, secure valuables, and cover the opening temporarily if rain is expected.
Do not rely on a loose plastic cover for normal driving. It can flap, block vision and allow fumes or water into the vehicle. If the rear view is restricted, make arrangements that keep the vehicle safe and legal until the replacement is fitted.
Take clear photographs of the damage and any features on the glass before arranging a quote. This helps identify the correct heated rear window and lets the fitter plan for trim, wiring and clean-up. Car Glass Service can assess the details and arrange practical on-site replacement for suitable vehicles.
A properly fitted rear screen is not just about making the vehicle look whole again. It gives you a dry, secure vehicle and a clear rear view when the weather turns – exactly when you need both most.