How Rear Window Replacement Works on Your Vehicle
A shattered rear window leaves more than a mess on the driveway. It can expose the vehicle to rain, theft and loose glass, while a damaged heated rear screen can affect visibility on cold mornings. Understanding how rear window replacement works makes it easier to know what to expect when a technician arrives and why a proper fitting matters.
Rear glass is not simply lifted out and swapped over. It is usually bonded into the bodywork, connected to heating elements and sometimes linked to aerials, cameras or other electrical components. The job needs the right glass, correct adhesives and careful preparation to leave the vehicle safe, weatherproof and ready for the road.
When does a rear window need replacing?
Most rear windows are made from toughened safety glass. Unlike a laminated front windscreen, toughened glass often breaks into many small pieces after an impact. This can happen after vandalism, a break-in, an accident, a falling object or a sudden temperature change where the glass was already damaged.
Once the rear window has shattered, replacement is normally the practical option. Even if the glass has only cracked, rear screens are often not suitable for a small repair because of their construction, built-in heating lines and the way damage can spread. A technician will check the condition of the glass, the frame and any surrounding trim before confirming what is required.
If the rear screen is broken, avoid slamming doors or driving at speed before it is dealt with. Air pressure can dislodge more loose pieces, and the open area makes the vehicle vulnerable to water and debris. Clear away only accessible loose fragments if it is safe to do so, but leave glass trapped in seals, panels and the boot area to the fitter.
How rear window replacement works, step by step
The exact process depends on the make, model and specification of the vehicle. A hatchback, saloon, SUV, van and campervan can each have different trim layouts, glass sizes and electrical connections. However, a professional replacement follows the same careful sequence.
1. Identifying the correct replacement glass
The technician first confirms the vehicle registration, model and glass specification. Rear glass may have a heater, tinted finish, privacy glass, an integrated aerial or mounting points for accessories. Some vehicles also have a rear-view camera or sensors positioned close to the glass.
Using the wrong specification can mean lost features or a poor fit. OEM-standard glass is selected to match the vehicle as closely as possible, including the correct shape, edge finish and fittings. For commercial vans, this check is particularly important because rear door glass and fixed rear panels vary widely between models.
2. Protecting the vehicle and removing loose glass
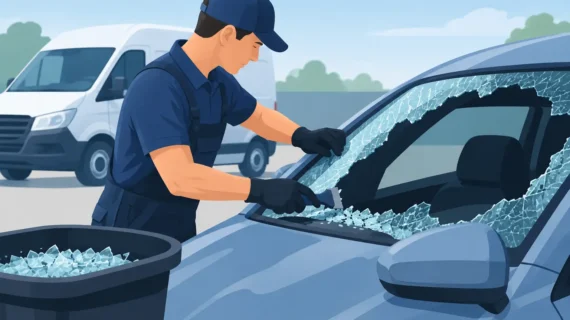
Before any removal begins, the technician protects the paintwork, interior trim and boot or load area. Broken pieces are carefully removed from around the frame, parcel shelf, seats, tailgate and seals. On a van, glass can travel further into the cargo space than expected, so a thorough clean-up is part of doing the job properly.
This stage is not rushed. Small fragments left behind can cause rattles, damage upholstery or create a safety issue later. A good fitter will also inspect the surrounding bodywork for dents, bent trim or corrosion that could affect the new glass seal.
3. Disconnecting heater and electrical connections
Most modern rear windows include demister lines. These fine horizontal elements warm the glass and clear mist or frost when the rear screen heater is switched on. Connections are usually attached at the lower edges of the glass and must be disconnected carefully.
Depending on the vehicle, there may also be aerial connections or other electrical fittings. The technician checks these before fitting the new screen so any damage or loose connection can be identified early, rather than discovered after the glass is installed.
4. Removing old adhesive and preparing the frame
Rear windows are commonly bonded in place with high-strength automotive adhesive. The remaining adhesive is cut back to a suitable level, while the bonding area is cleaned and prepared according to the materials being used.
Preparation is one of the parts of the job customers do not always see, but it makes a real difference. Dirt, moisture, damaged paint or incorrect primer can compromise the bond. If corrosion is found around the aperture, it may need attention before the new glass is fitted. Simply covering it with adhesive is not a lasting solution.
5. Applying adhesive and fitting the new rear screen
A fresh bead of approved automotive adhesive is applied evenly around the prepared frame. The replacement glass is then positioned accurately using the correct handling tools and aligned with the bodywork and trim.
The aim is not just to make the glass look straight. It must sit at the right depth so seals, tailgate gaps and surrounding panels work as intended. On rear windows with heater terminals, the fitter reconnects the wiring once the screen is in position, taking care not to damage the new connections.
6. Curing time and final safety checks
Automotive adhesive needs time to cure. The safe drive-away time depends on the adhesive used, weather conditions and the vehicle, so the technician should give clear advice before leaving. In cooler or wetter conditions, curing can take longer than on a warm, dry day.
Before handover, the new rear window is checked for alignment, secure bonding, clean edges and correct trim refitting. The rear heater and other relevant features should also be tested where possible. The vehicle is then vacuumed and checked again for stray glass.
Why rear window fitting should not be treated as a quick DIY job
Temporary film can help protect an open vehicle for a short period, but it is not a replacement for properly fitted glass. Rear screens affect rear visibility, vehicle security and protection from the weather. Poor adhesive application can lead to leaks, wind noise, loose trim or glass movement.
There is also an electrical side to consider. Damaging heater terminals or fitting glass without the right connections can leave the rear demister unusable. For drivers who rely on their vehicle for work, that can be more than an inconvenience during winter mornings and wet London weather.
Professional fitting also means the glass is handled safely. Toughened glass breaks into small pieces, but those pieces are still sharp and can be difficult to remove completely from carpets, door shuts and cargo areas.
What affects rear window replacement time and cost?
The price and fitting time depend on the vehicle and the type of rear glass required. A basic rear screen on a common hatchback is different from privacy glass with heating elements, an aerial and specialist trim. Availability can also make a difference, particularly for older vehicles, luxury models, imported vehicles and certain commercial vans.
Damage around the frame may add work too. If a break-in has bent a tailgate, damaged a seal or affected the surrounding bodywork, these issues should be assessed before the glass is bonded in. The most useful first step is to provide the registration, vehicle model, your location and a clear description or photograph of the damage when requesting a quote.
For many customers, the biggest benefit of a mobile service is avoiding the need to drive an unsafe vehicle to a workshop. A technician can attend at home, at work or where the vehicle has been left, provided there is safe access and suitable space to carry out the fitting.
After the new rear window is fitted
Follow the fitter’s advice about curing time and avoid washing the vehicle immediately unless told otherwise. Do not use high-pressure water around the new glass during the early curing period. It is also sensible to avoid forcefully closing the boot or tailgate for the first day, as sharp pressure changes can affect fresh adhesive.
Check that the rear heater works when conditions allow, and keep an eye out for unusual wind noise or moisture around the glass. These are uncommon with correct installation, but raising any concern quickly gives the fitter the best chance to inspect it.
For West London drivers, van operators and fleet users dealing with broken rear glass, Car Glass Service can arrange on-site replacement using the correct vehicle-specific glass and materials. A clear quote, careful clean-up and proper fitting are what get the vehicle back to being secure and usable.
A broken rear screen is disruptive, but it does not need to leave your car or van off the road for longer than necessary. Keep the vehicle dry and secure where possible, avoid handling hidden glass, and arrange a professional inspection as soon as you can.