Campervan Side Window Fitting Example
Cutting into a van side panel is the point where a camper conversion stops being an idea and starts becoming real. A proper campervan side window fitting example helps because most problems do not come from the glass itself. They come from poor measuring, rough cutting, weak rust protection, or a window that is simply wrong for the vehicle.
If you are planning a conversion, or you need a side window fitted properly without trial and error, it helps to see how the job should run from start to finish. Below is a practical campervan side window fitting example based on the kind of work carried out on popular panel vans used for day vans and full camper builds.
A practical campervan side window fitting example
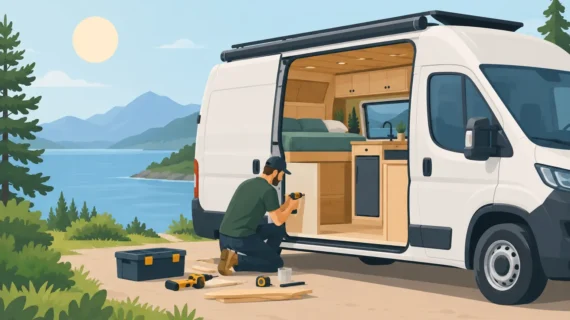
Take a medium wheelbase panel van being converted for weekend trips and longer touring. The owner wants more natural light on the nearside, privacy when parked, and a factory-style finish that does not look like an afterthought. In this example, the chosen glass is a bonded privacy side window designed to suit the van model rather than a universal fit.
That detail matters. A model-specific window generally gives a cleaner line, a more secure bond, and less chance of future rattles or water ingress. Universal products can work in some cases, but they often create extra trimming work and can leave the finish looking less tidy.
The job begins with checking the vehicle panel, the internal structure, and the exact glass specification. Not every van side is the same. Some have a clear stamped recess that makes positioning straightforward. Others need more care because internal bracing, lining panels, or previous conversion work may affect where the cut can safely go.
Before cutting, the measuring has to be right
This is the stage people are most tempted to rush, and it is where expensive mistakes start. The correct template or aperture dimensions need to match the actual window, not just the van make and model listed on an order sheet. Small variations matter.
The fitter marks the cut line carefully, checks it against the outer panel shape, and confirms the glass will sit square from the outside. On many vans, the visual line of the body can fool the eye. What looks level against one swage line may be slightly out once the glass is offered up.
A good fitter will also check inside the van before any cutting starts. Wiring for lights, insulation, ply lining, and trim all need moving out of the way. Metal filings travel further than most people expect, and if the inside is not protected properly, they can damage trim and create rust points later.
Cutting the aperture without damaging the van
Once everything is marked and protected, the side panel is cut. This part needs a steady hand and the right tools. There is a big difference between making an opening and making a clean opening that is fit for bonding glass.
In our campervan side window fitting example, the cut is made progressively rather than aggressively forcing through the panel. The aim is to avoid bending the surrounding metal, chipping paint beyond the cut edge, or leaving jagged sections that will complicate the bond.
After the panel section is removed, the raw edge is dressed and cleaned. Any sharp or uneven points are smoothed out so the aperture is consistent all the way round. This is not just for appearance. Bonded windows rely on proper contact surfaces and even spacing.
Then comes one of the most important parts of the whole job – edge protection. Bare metal must be treated correctly. If this step is poor or skipped, moisture can get to the cut edge and start corrosion under the seal area. You may not see the problem straight away, but it can show up later as bubbling paint or staining around the glass.
Preparing the glass and body for bonding
Bonded side windows are not just pressed into place with general-purpose adhesive. The surface preparation has to match automotive glazing standards. That means cleaning the bonding area properly, using the right primers where required, and applying adhesive in a controlled bead.
The glass itself is checked before fitting. There is no point preparing the van perfectly if the pane has transport damage, incorrect curvature, or a flaw in the edge finish. A proper check now avoids having to remove fresh adhesive and start again.
Positioning blocks or guides may be used depending on the window design. These help keep the glass aligned while the adhesive takes hold. On a privacy glass side window, alignment is especially noticeable because the dark finish shows any uneven gap against the bodywork.
Setting the window in place
With the adhesive applied, the window is lifted into place carefully and evenly. This is not the moment for guesswork. Once the pane touches the adhesive, there is limited room for adjustment, so placement needs to be accurate.
The fitter presses the glass into its final position, checks the reveal around the edge, and makes sure the line matches the van body properly. From outside, the window should look balanced and intentional, not slightly twisted or set too high at one corner.
In some cases, temporary retention tape is used while the bond cures. Cure time depends on the adhesive system, temperature, and conditions on the day. That is one reason mobile fitting still needs proper process control. Fast service is useful, but rushing cure times is where quality starts to suffer.
What can go wrong on a campervan window job
Most bad side window installations follow the same pattern. The cut-out is slightly off, the edge treatment is poor, the wrong adhesive is used, or the glass is not seated squarely. Sometimes the first sign is a visible gap. Sometimes it is wind noise at speed. Sometimes water ingress only shows up after heavy rain.
There are also van-specific issues. Some older vans have previous body repairs or hidden corrosion around the intended opening. Some conversions already have insulation and furniture that make access awkward. On certain models, cheap aftermarket glass can be a poor match for the body line, which leaves the fitter trying to correct a problem that started with the part itself.
This is why a fitting example matters more than a simple how-to description. The real job is not just cutting a hole and bonding in a pane. It is checking all the variables that affect the finish and the long-term reliability of the installation.
Privacy glass, opening windows, and fixed glass
Not every campervan side window installation is the same, because the right setup depends on how the van is used. A fixed privacy window is often the cleanest option for looks and security. It gives light, improves the feel inside the van, and usually offers a more factory-style finish.
An opening side window adds ventilation, which is useful if the van is used for overnight stops or cooking. The trade-off is that opening units can be more complex to fit and may need more attention to alignment and sealing. They can also affect the overall appearance depending on the design.
For some owners, matching the opposite side is important as well. A single new window can transform the van, but symmetry often matters if you want a professional look rather than an obviously pieced-together conversion.
Why professional fitting usually saves trouble
A side window is one of those jobs that looks manageable until the cutting starts. After that point, there is no undo button. If the aperture is wrong, the panel edge is damaged, or the bond is poor, correcting it can cost more than getting it fitted properly in the first place.
For van owners in West London, mobile fitting has an obvious advantage. The van can stay at home, at work, or at a unit while the installation is carried out, which is useful if the vehicle is part of a working fleet or an active conversion project. What matters is not just convenience but knowing the fitter arrives with the correct glass, bonding materials, and experience for the vehicle.
Car Glass Service handles this kind of work with the same practical approach as urgent automotive glazing jobs – assess the van properly, use OEM-standard materials, fit the glass cleanly, and make sure the result is safe and tidy.
Is every van suitable for the same window layout?
No, and that is where honest advice counts. Some layouts suit the van shape better than others. Some conversions need more opening sections for ventilation. Others benefit from fixed privacy glass for a neater finiWhen a campervan side window is fitted properly, it should look like it belongs there. The best result is not flashy. It is a clean line, a dry interior, good light inside the van, and no worries every time the weather turns.