Campervan Solar Safety for Off-Grid Travel
A loose cable behind a cabinet, a poorly sealed roof gland or an unfused battery lead can turn a useful campervan upgrade into a serious problem. Campervan solar safety is not just about getting power for lights, mobile phones and a fridge. It is about fitting a system that remains safe when the van is moving, parked in heavy rain, charging in strong sun or left unused for weeks.
Solar power is a great addition to a conversion, particularly for weekends away and longer off-grid trips. However, a campervan combines vibration, metal bodywork, limited ventilation and high-current batteries in a small space. The system needs to be planned and installed properly from the start.
Campervan Solar Safety Starts With a Proper Design
Do not choose solar components by panel size alone. A safe system needs to match the way you use the van and the equipment you expect it to run. A small panel and leisure battery may be enough for lighting and USB charging. A compressor fridge, inverter, diesel heater fan or laptop charging setup will need more capacity and a more carefully designed cable run.
Start by working out your likely daily power use. This helps you select the right battery capacity, solar panel output, charge controller and cable size. Oversizing a component is not always a problem, but undersized wiring, connectors or fuses can overheat under load.
The battery chemistry also matters. Lead-acid, AGM and lithium batteries have different charging requirements and different safety considerations. Lithium batteries are popular because they are lighter and offer more usable capacity, but they must be paired with a suitable charger and battery management system. Fit them where they are protected from damage, excessive heat and moisture, and follow the battery manufacturer’s installation guidance.
A solar charge controller should be selected for the panel voltage and battery type. MPPT controllers are often the better option where roof space is limited or panel voltage is higher, but the controller still needs to be correctly rated. Check its maximum solar input voltage and current before fitting anything.
Protect Every Cable With the Right Fuse
The most critical campervan solar safety rule is simple: cables connected to a battery need protection close to the battery. A leisure battery can release a very high current if a positive cable rubs through or is accidentally shorted against metalwork. That can melt insulation, damage the battery and create a fire risk.
Fit a correctly rated fuse or circuit breaker in the positive cable as close to the battery terminal as practical. The fuse protects the cable, so its rating must be chosen to suit the cable size and expected load. Fitting an oversized fuse simply because it stops nuisance blowing defeats the purpose.
The solar panel side also needs a safe means of isolation. Panels produce electricity whenever they are exposed to daylight, even when the rest of the system is switched off. Use DC-rated isolators and breakers designed for the voltage and current of the solar array. AC switches and household components are not automatically suitable for DC use, where an electrical arc can be harder to interrupt.
Keep cable runs tidy, supported and protected wherever they pass through a panel, floor, roof or sharp metal edge. Use proper grommets, conduit or edge protection. Do not rely on tape around a hole, and do not leave wiring loose behind furniture where it can chafe as the van moves.
When connecting a charge controller, follow the manufacturer’s sequence. Many controllers require the battery to be connected first so the unit can identify the battery voltage correctly, then the solar input can be connected. Isolate the solar panels before carrying out changes, and never work on live battery cables with rings, watches or loose metal tools nearby.
Safe Solar Panel Fitting on a Campervan Roof
A panel that works well electrically still has to stay on the roof at motorway speed. Roof fitting is where waterproofing and mechanical strength matter just as much as the wiring.
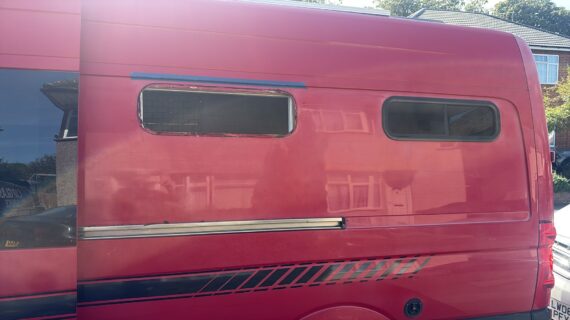
Panels should be mounted using brackets and fixings suited to the roof material and the panel size. A larger panel catches more wind, so it needs secure support across a suitable area rather than a few light fixings at the corners. Check that the roof is sound and that the chosen position will not interfere with a roof vent, skylight, aerial, pop-top mechanism or opening door.
Any hole through the roof needs a proper cable gland and a sealant compatible with the roof surface. The area should be clean, dry and prepared correctly before sealing. Water ingress may not show immediately. It can travel through insulation or roof lining and later cause staining, corrosion, mould and damage to the conversion interior.
Think about shading before finalising the panel position. A roof bar, satellite dome, open pop-top or even a nearby skylight can reduce output. This is not only an efficiency issue. It can lead owners to add larger panels or draw harder from the battery because the expected charging performance is not there.
If you are fitting solar alongside a new roof vent or skylight, plan both jobs together. It avoids drilling around existing fittings later and makes it easier to leave enough access for future maintenance. Car Glass Service can advise on conversion glass, skylights and solar panel fitting as part of a practical campervan conversion plan.
Batteries, Ventilation and Inverters Need Extra Care
The battery location deserves proper thought. It should be secure, accessible for inspection and away from areas where it can be kicked, crushed by stored gear or exposed to water. A loose leisure battery is dangerous in an emergency stop as well as a risk to the wiring.
Some battery types require ventilation because they can release gas during charging. Check the manufacturer’s requirements rather than assuming all leisure batteries can be boxed into an airtight cupboard. Lithium batteries have different needs, but they should still have adequate space around them and should not be installed beside a heat source.
Inverters need particular attention because they can draw a large current from the battery even when powering ordinary household items. A 230V appliance may look modest, but the 12V current supplying it can be substantial. Use appropriately sized cables, a correctly rated fuse and solid battery connections. Keep the inverter cable run short where possible.
If you are adding 230V sockets, mains hook-up or a battery charger, this is no longer a simple low-voltage job. The installation needs suitable protection and should be completed and checked by a competent person familiar with electrical systems in leisure vehicles. Do not mix mains and 12V wiring in the same unprotected route, and clearly label isolators so anyone using the van knows what they control.
Check the System Before Every Trip
A quick visual check can prevent a small issue becoming an expensive one. Before heading away, look at the panel brackets, roof sealant, cable gland and visible wiring. Check that battery terminals are tight and free from corrosion, and make sure no stored equipment has been pushed against cables or the controller.
Pay attention to warning signs such as a hot cable, a burning smell, repeated fuse failure, swollen battery casing, water marks around the roof lining or a controller showing unusual readings. Stop using the system and investigate the cause rather than replacing a fuse and carrying on.
It is also worth carrying a basic record of the installation. Note the panel output, controller model, battery type, fuse ratings and cable routes. This makes fault-finding easier and gives a future owner or technician a clear starting point.
Solar should make campervan travel more independent, not add uncertainty. Give the roof fittings, cable protection and battery installation the same attention you would give brakes, tyres or vehicle glass, and you can enjoy reliable power without taking unnecessary risks.