Best Upgrades for Campervan Windows That Pay Off
A campervan can look finished from the outside but still feel dark, stuffy or exposed once you spend a night inside it. The best upgrades for campervan windows are not always the most obvious ones. The right glass, opening sections, insulation and blinds make a real difference to comfort, security and how usable the van feels in British weather.
For most conversions, windows should be planned early rather than added as an afterthought. Their position affects your furniture layout, ventilation route, privacy and even where you can fit solar panels or a rooflight. A professional installation also matters. Cutting a van panel and fitting automotive glass correctly is a safety job, not a place to cut corners.
Start with the Right Campervan Windows
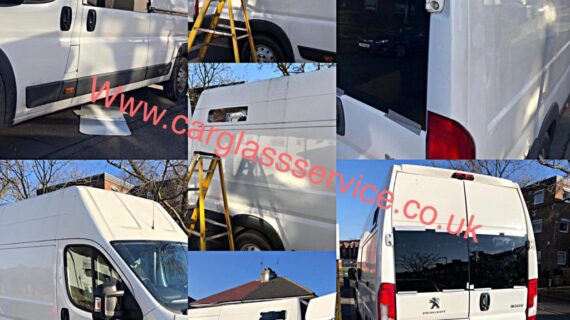
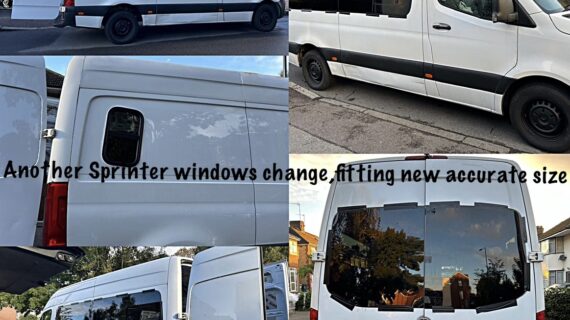
The first upgrade is often replacing a solid panel with professionally fitted side glass. It brings daylight into a dark load area and makes reversing, parking and driving on narrow roads far easier. It also changes the feel of the interior immediately, particularly in a long-wheelbase van with a fixed bed or rear seating area.
Fixed bonded windows are a good choice where you want light, clean lines and fewer moving parts. They suit lounge areas, rear doors and bed spaces where opening the glass is not essential. Quality privacy glass gives a more factory-style finish while helping to keep valuables less visible from outside.
Opening windows cost more than fixed glass, but they are usually worth considering beside the bed, kitchen or seating area. They create cross-ventilation when paired with a rooflight or an opening window on the opposite side. That matters on warm nights, when cooking, and when drying damp coats after a weekend away.
It depends on the van and layout. A sliding window can be practical beside a kitchen unit, while a top-hinged or outward-opening design may give better airflow when parked. Think about doors, awnings, furniture and where people sit outside before choosing the opening direction.
Use Automotive-Grade Safety Glass
Campervan side windows should be purpose-made automotive glazing, correctly matched to the vehicle and fitted with the right bonding materials. The glass needs to sit properly against the bodywork, seal against water ingress and cope with vibration, temperature changes and daily use.
A neat-looking installation is important, but the unseen preparation matters just as much. The cut edge must be treated properly to help prevent corrosion, and the glass must be bonded accurately. Poor fitting can lead to leaks, wind noise, loose trim and expensive repairs later.
Best Upgrades for Campervan Windows: Privacy and Shade
Privacy glass is one of the most useful upgrades for a campervan. It reduces the view into the living space during the day and gives the van a more discreet appearance. However, tinted glass is not a complete privacy solution. When interior lights are on after dark, people can still see movement and shapes inside.
That is why fitted window coverings are worth budgeting for from the beginning. The best option depends on how you use the van. Thermal blackout blinds are excellent for overnight stops, while curtains can make a camper feel warmer and more homely. Removable magnetic or suction-fit screens are flexible and easy to store, but they need to fit closely if you want proper light control.
For cab windows, external thermal screens are particularly effective in cold weather. They reduce heat loss through the windscreen and front doors, where a lot of condensation can form. Internal screens are quicker to put up and may suit a van parked on the street, but external covers generally provide better insulation.
Choose materials that are easy to wipe down and resistant to condensation. Thick fabric can look smart, but it holds moisture if the van is not ventilated. In a compact conversion, practical usually beats decorative.
Add Ventilation Before You Need It
Windows and ventilation work together. Opening side glass alone may not shift enough air through a camper, especially if it is raining or the van is parked in a still, sheltered spot. A rooflight or roof vent can give warm air somewhere to escape, while side windows draw cooler air in.
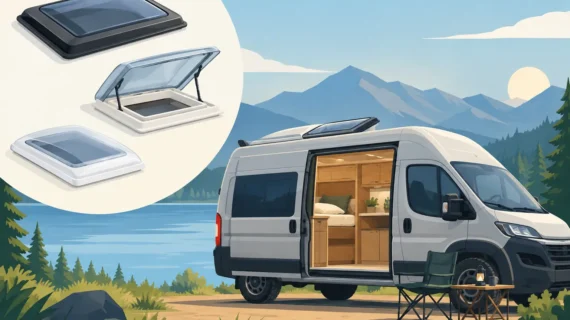
A rooflight above the cooking or sleeping area is a strong upgrade for many builds. It adds natural light from above, gives a feeling of extra headroom and reduces the heavy, closed-in feeling common in panel vans. Models with an integrated flyscreen and blackout blind are especially practical for overnight use.
Do not assume bigger openings are always better. Large rooflights and multiple opening windows can increase cost, add potential leak points and affect where roof bars, solar panels or a pop-top can sit. Plan the whole roof and window layout together.
Ventilation also helps manage condensation, but it will not remove it completely. Breathing, cooking and wet clothing all put moisture into a small space. Keeping a vent slightly open where safe, using insulated screens and allowing airflow around bedding will make mornings more comfortable.
Improve Insulation Around the Glass
Glass will always be colder than an insulated van wall, so heat loss through windows is normal. The goal is to reduce the effect without turning the interior into a cave. Thermal blinds, insulated curtains and cab screens are usually the most cost-effective improvements.
If you are fitting windows during a full conversion, pay attention to the surrounding panels too. Insulation should be installed neatly around the apertures without blocking drainage routes, interfering with window mechanisms or leaving gaps that encourage rattles. The trim finish should be secure and tidy, as exposed sharp metal or loose lining is not acceptable in a living area.
Double-glazed acrylic windows are common on some motorhomes and can offer good thermal performance. For a panel-van conversion, bonded glass often gives a more vehicle-like finish and excellent visibility. The right choice comes down to your layout, budget, use through the year and whether you need the window to open.
Consider Flyscreens and Rain Guards
Fresh air is useful until insects arrive or rain starts blowing through the opening. Proper flyscreens are a small upgrade that pays off quickly, particularly if you camp near water, woodland or open fields. Integrated screens are the neatest option, but well-fitted removable mesh can also work well.
Window rain guards can allow certain sliding windows to stay slightly open in light rain while reducing wind noise. They are not suitable for every window style and should never be treated as a substitute for secure ventilation. Always check that the window is properly closed and locked before driving or leaving the van unattended.
Do Not Overlook Rear and Cab Glass
Rear door windows can transform a van with a rear lounge, bed or bike storage area. They improve natural light and make the back of the vehicle feel less confined. On the other hand, if you carry tools, bikes or valuable kit at the rear, privacy glass and secure internal coverings become more important.
Cab windows need attention too. A windscreen shade, side-window screens and good ventilation can make a big difference to summer heat and winter condensation. If the windscreen or side glass is damaged, arrange replacement promptly. Safe visibility is not an optional part of a camper build.
Get the Window Layout Professionally Fitted
The best window arrangement is one that works with your actual use of the van. A weekend surf van needs different airflow and privacy from a full-time touring conversion. A family layout may benefit from more light and opening sections, while a work van that doubles as a camper may need a more discreet setup.
Car Glass Service fits fixed and opening windows for campervan conversions across West London, including popular vehicles such as the Mercedes Sprinter, Ford Transit and Transit Custom, VW Crafter, Citroen Relay, Peugeot Boxer and Fiat Ducato. Proper measuring, correct glass selection and careful bonding help ensure the finished van looks right and stays weatherproof.
Before committing, stand inside the empty van and mark out the bed, kitchen, seats and storage. Then decide where light, airflow and privacy matter most. A well-placed window is more than a visual upgrade – it makes every overnight stop easier to enjoy.